I constantly try to improve my photography workflow. Number of my pictures in Lightroom catalog grows every day and I need really solid process to handle all the files from the very beginning. The first step, right after the import, is an initial selection. It means that I don’t keep all the images that my camera captured. The storage is cheap and I know many people tend to keep all the pictures on their hard drives in case they change their minds, nevertheless I remove some of them to keep my workflow efficient and to save some space on my drives. Also, the Lightroom seems to be working a bit slower with the collection getting bigger and bigger.
Pick and Reject flags
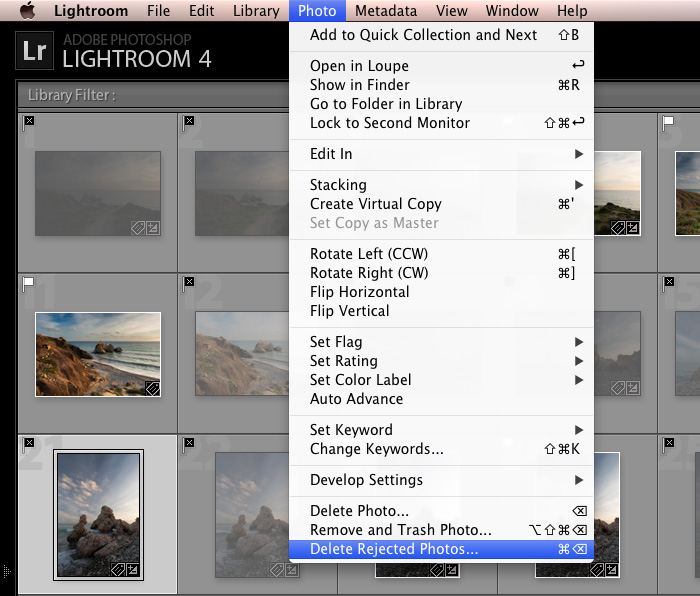
Pick and reject flag in Lightroom is a tool which basically marks pictures as picked and rejected. The current state of the photo is indicated by the icon in top left corner – either black for rejected and white for picked. I used to use star ratings for the same purpose some time ago marking rejected pictures with one star, but since I discovered pick and reject I have never looked back. There’s one important difference between both solutions. Pick and reject has another built in functionality – Delete all rejected photos under Photo menu. This means that after selecting all the accepted photos, and marking the ones that we are not interested in, we can simply tell Lightroom to remove all the rejected photos from the drive.
Getting efficient
How to use this feature efficiently? Use keyboard shortcuts! For picking and rejecting use p and x keyboard keys accordingly. You can press the shift key while marking the photo if you want to proceed to the next one. To improve the process have caps lock enabled so the Lightroom will advance to the next photo each time you make a decision automatically and every time. If you want to undo your decision press u key to remove the selection flag.
If you belong to the group of people who doesn’t remove pictures from the drive you can still use this feature. There’s an option to Hide Rejects in the filters and you won’t see rejected photos in your collections but the photos won’t be affected in any other way.
Summary
- p – pick
- x – reject
- u – undo/unflag
- ⇪ caps lock – advance to the next picture after setting the flag when on
- ⌘⌫ – Delete Rejected Photos (ctrl+backspace for windows)
Did you try this? Even if you don’t pick the image, it will keep it. You can just ‘x’ the ones you don’t want and then delete just those. Saves you a keystroke ‘p’ – which is also painfully located away from your cursor.
Hey Rick, good point. I look at it this way – reject deletes, pick picks the best ones, and the rest is a “maybe”. So the ones that are unmarked are not deleted and they are not displayed as picks.
But for efficient deletions, just the reject keystroke will do the job for sure!